In This Topic
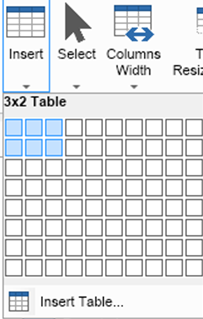
To insert a table, click on the Insert button on the far left of the Table ribbon bar. A grid box will pop up below the button, allowing you to use the mouse to choose how many rows and columns the table you would like to insert will be. A numerical value will appear at the top of the grid for quick understanding of the number of rows and columns currently chosen. When have the right numbers of rows and columns you wish your table to be, click on the box where the mouse is located at present, and the table will appear in the center of the drawing area.
Inserting and Removing Rows and Columns
To insert a row in your table, use one of the four insert buttons in the Rows & Columns area of the Table ribbon bar. These will insert a column or row in the direction you wish, based on what column or row you have selected in your table. Alternately, you can right click on the table, and in the context menu hover over insert, and choose from the same option list.
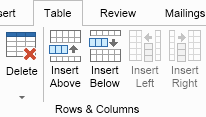
To remove a column, use the Delete button the Rows & Columns area. A drop down menu will allow you to choose to delete a row, column, or the entire table. You may also choose these options in the right click context menu under the Delete drop down menu.
Merging and Splitting Cells
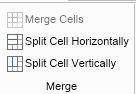
To merge two or more cells, simply click, hold and drag to select more than one cell, and click on the Merge Cells button to make one larger cell. A cell may only be split after it has already been merged. If multiple cell rows and columns have been merged, the option to split them horizontally or vertically will be selectable in the Merge area of the Table ribbon tab.
Specifying Column Size
To specify your column width, click on the Columns Width button in the Table area. A drop down menu will offer three choices, including:
- Fixed: This will keep each row the width it currently has, and allows you to customize the table column width to your liking using the mouse.
- Percentage: This option will keep each row as an equal percentage of the width of the table
- Fit to Content: This option will automatically change the table columns width based on the size of the text and/or shapes within the table cells
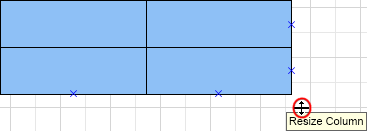
To manually change the width of a column, hover the mouse cursor over any table border line, and a line with a small arrow on either side will appear. Click and hold, and drag the border line to your desired sizing