Formatting Shapes Overview
In This Topic
Each shape in MyDraw can be formatted to add styles, geometry changes, add text blocks, outlines, shadows, etc. There is a high level of customization options available for each shape, some more than others.
Editing Geometry
To edit the geometry of a shape, right-click on the shape and choose Shape Properties and the Shape editor dialog will appear.
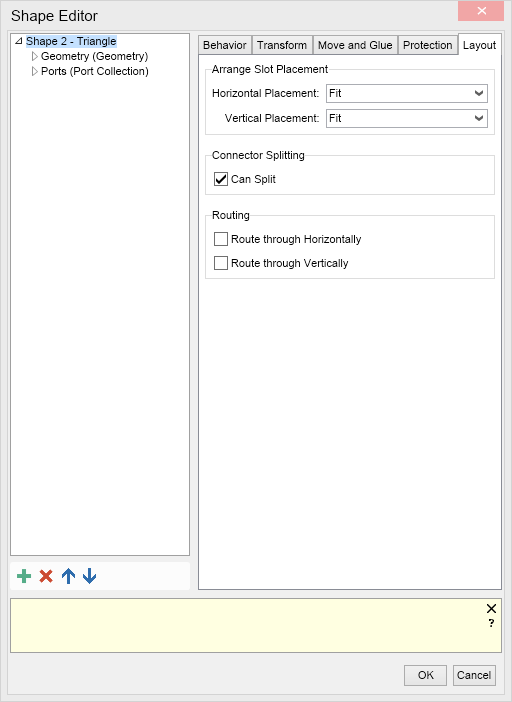
There are five settings tabs in the shape editor, including:
- Behavior - Here, you can name the shape and choose how the shape behaves within the program.
- Transform - Here, you can manipulate the size, x and y-axis, position, and relative location settings.
- Move and Glue - The area to choose the default shape glue settings and slave shape settings.
- Protection - This tab allows you to restrict editing options on the shape, including the ability to change the aspect ratio.
- Arrange - Slot placement and connector splitting options, including routing options.
To the left side of the tabs are sub-menus gives additional options for the geometry and port options.
Formatting Geometry
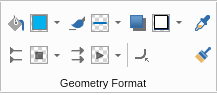
To change the appearance of a shape use the split buttons in the Geometry Format ribbon group of the Home tab. They will let you change the fill, stroke and shadow of a shape, as well as its corner rounding. If the selected shape is a 1D shape (i.e. a connector) you can also change its start and end arrowheads.
To pick the geometry formatting of the selected shape or the format anchor shape in case of multiple selected shapes, click the copy geometry formatting button (the rightmost pipette on the image below). Then select one or more shapes and click the apply geometry formatting button (the rightmost brush on the image below).
Shape Size, Position and Rotation
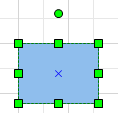
To select a shape either click it or click and click and hold outside of the shape and drag to trigger the rectangular selection tool, then drag it to cover and select the shape. When the shape is selected, a set of trackers will appear around it as shown in the picture to the left.
To rotate a shape use the circular tracker above the shape. You can also use the buttons in the Rotate ribbon group of the Action tab from the ribbon.
Themes
On the Design tab, you can choose the Page Theme and Page Theme Variants. Themes apply to a whole drawing page. They consist of a set of shape styles with fill, stroke and text styles that blend well with each other. Choosing a page theme will change, and nearly all visual aspects of the page and shapes, excluding shape geometry. The default theme is MyDraw Nature, Variant 1.
For more information check out the Themes And Shape Styles topic.
Formatting Text Blocks
To create a text block, choose the T button from the home tab, and click, hold and drag anywhere in the drawing area.
Double click in the text box that appears, and type your text. On Home tab, you can find options for font, bold, italic, underline, etc.

In addition to the normal options, there are four additional option menus. You can access them either from the text section of the home menu, or right click anywhere in the box and hover over the “Format Text Block” menu to show the options available.
The options are:
- Text Fill: A dialogue window will appear, allowing you to choose the different types of text fill
- Text Background Fill: This menu allow you to choose the style and color of the text background filler
- Text Stroke: A menu to allow you to select the stroke options
- Text Shadow: Options for text shadow.